How to make an automatic chicken feeder step by step
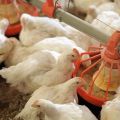
In order to maximize the productivity of birds, they need to provide quality care. An automatic modern chicken feeder allows you to organize feed intake for them without the presence of a person. As the previous portion is eaten, the missing portion of the feed is added. Refuel these feeders on time and the birds will always be well fed.
Why are auto feeders needed and how do they work?
With automatic feeders, birds receive new food automatically as they eat old ones. The use of commercially available items that operate with a timer allows you to add feed at predetermined times, preventing birds from overeating or scattering leftover feed.
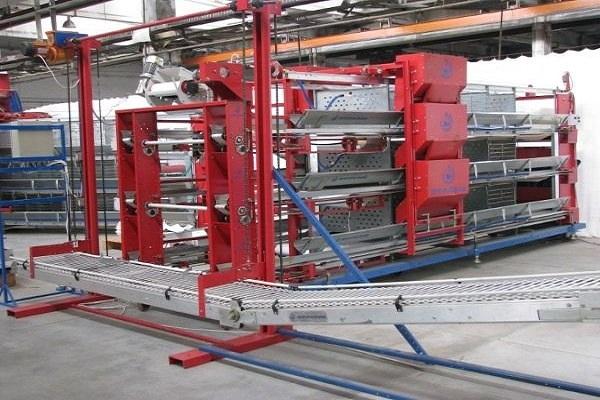
Overview of industrial models
Not only the simplest hopper feeders are on sale, but also those that are equipped with a timer and a function that allows you to spread feed. The price of the former ranges from 500 to 1500 rubles. More advanced models can be up to six times more expensive.
Expensive designs usually provide a capacity for a tank with a volume of up to 20 liters. It can be made of special plastic or metal. The amount of feed provided at one time in some models can be programmed.
Expensive devices pay for themselves when they are bought for a large poultry farm.
DIY bunker feeders
Their manufacture is considered the least laborious.
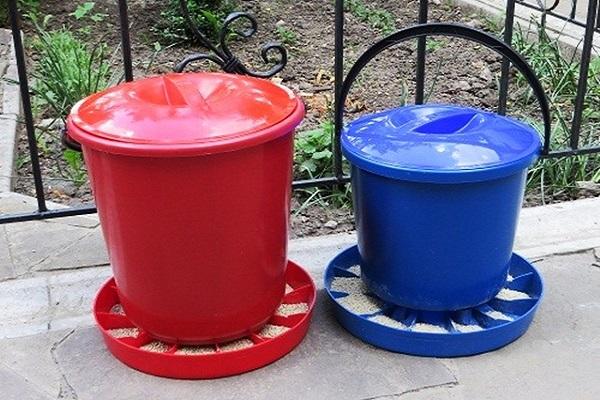
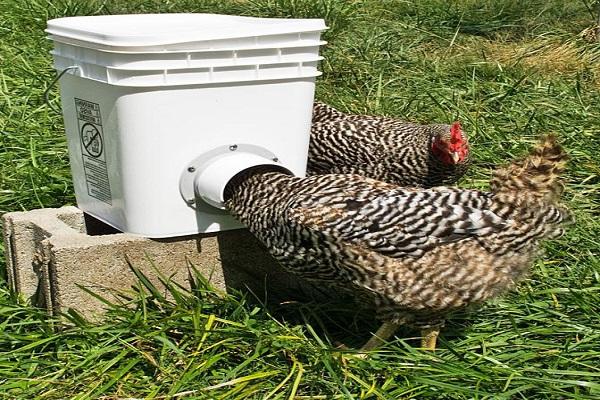
From a plastic bucket
To create a structure you will need:
- A bucket made of plastic. Usually take one that has a suitable volume - usually from five to ten liters. You need a lid that can be tightly closed.
- Food tray that can be used with spacers. Usually it is a flat pallet divided into several sectors. This item is available for sale at specialized retail outlets. A tray or small basin is suitable for this purpose. It should protrude 20-30 centimeters beyond the bucket.
- A tool that can be used to create holes in a plastic bucket.
- Various types of fasteners with which the bucket and tray will be attached.
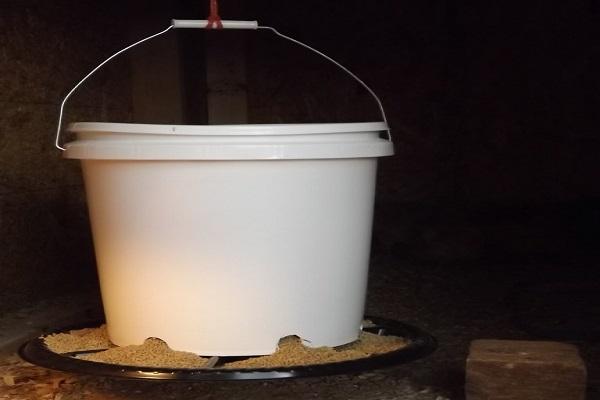
Manufacturing procedure:
- Small holes (4-5 centimeters in diameter) are cut in the side of the bucket at the very bottom. They are located at an equal distance from each other. If a tray with dividers is used for the feeder, then their number must match the number of holes.
- The tray connects to the bottom of the bucket using fasteners.
It is necessary to pour food inside and close the bucket tightly with a lid. It is convenient to use this design inside the house, but not beneficial in the yard, where the feed can get wet if it rains.
The holes must be sanded with sandpaper so that the birds cannot get hurt by them..
If there is not much feed left in the bucket, it will not spill over the birds. To remedy this, it is advisable to place the cone so that the feed rolls towards the edges.

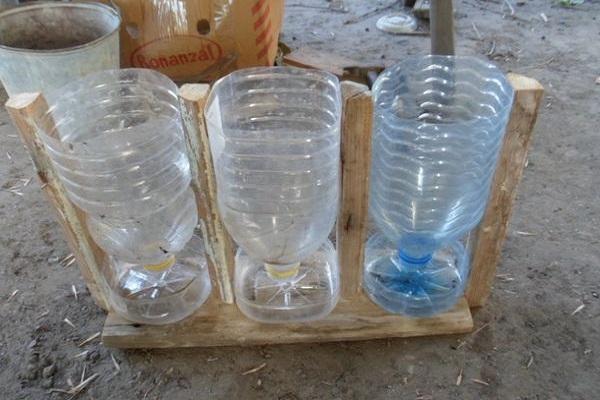
From plastic bottles
You will need to prepare the following:
- Two bottles made of plastic, the volume should be 1.5-2 liters. It is important that the top of one of them goes to the bottom of the other.
- Feed tray. In this capacity, you can use a bowl or something similar. It is important that the edges are not too high, otherwise the chicks will not be able to receive food.
- Tool for working with plastic.
Step-by-step instructions for creating a feeder:
- Cut off the bottom and top of one bottle (largest) and the top cone of the second.
- In the side part, round holes are cut out at the bottom. Their diameter should be equal to two centimeters.
- Attach the cut-out bottle to the tray.
- A small bottle is closed with a lid and placed inside the tank.
An inner cone is needed to pour the feed to the holes.
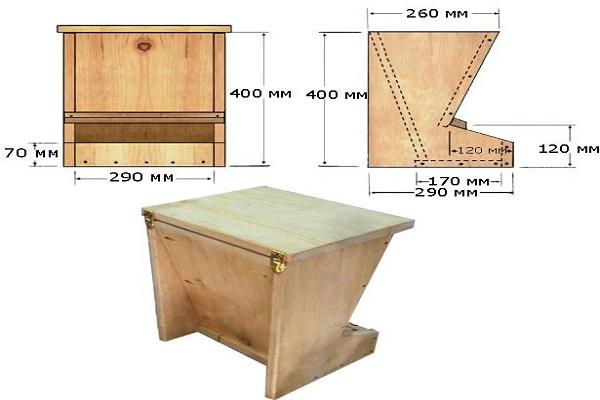
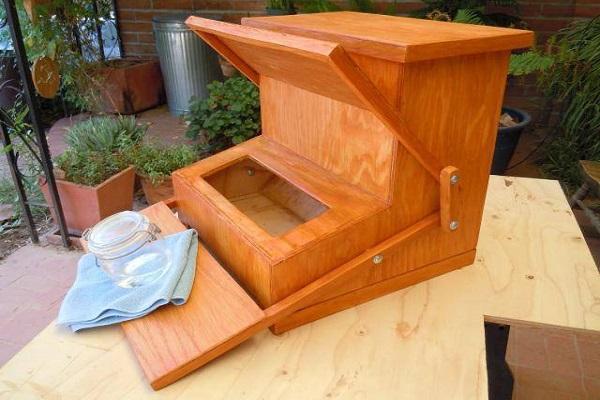
Wood or plywood
The use of wooden feeders is more aesthetically pleasing than plastic ones. Although this is not critical for raising chickens, their appearance is an argument in their favor. An important difference between them is the ability to design a structure for the required feed volume.
In order to get the job done, you need to prepare the following:
- Plywood or boards in the required quantity.
- You will need a drill and drill with a suitable diameter.
- To fasten the wooden parts, you need to prepare screwdrivers and self-tapping screws.
- Saw.
- Surface cleaning paper.
- For marking, you need to take a marker or pencil.
- A ruler or tape measure for taking measurements.
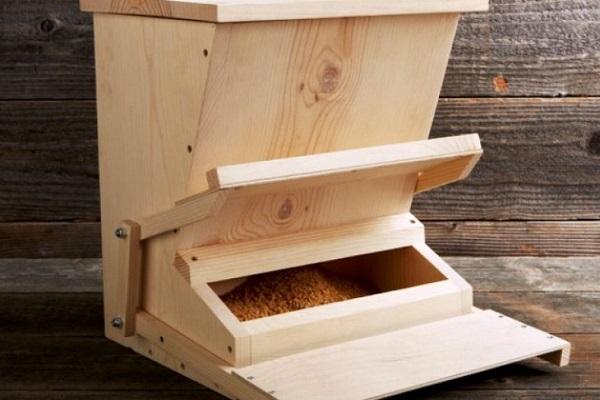
Without pedal
Before starting work, you need to draw a drawing on a sheet of paper indicating all the required dimensions.
The manufacturing procedure consists of the following parts:
- Before you can cut out the wood pieces, you need to create the appropriate patterns. To do this, draw all the parts on paper in full size. Then they are cut out.
- Wooden parts are cut out in accordance with the prepared templates.
- In places where it will be necessary to make fastenings, holes are made with a drill for self-tapping screws.
- All wooden parts are processed with sandpaper. This is important to prevent the birds from getting hurt.
- It is necessary to collect wooden parts and fasten them with self-tapping screws.
- The top cover is hinged to the feeder.
It is necessary to treat the structure with an antiseptic. It is not recommended to use varnishes and paints due to the fact that it can negatively affect the health of chickens.
With pedal
When making a wooden feeder with a pedal, in addition to the above materials, you will need plywood or a board for making a pedal, as well as thin wooden beams to create an opening mechanism.
Manufacturing takes place in the same way as described for the feeder without a pedal, but in addition, it will be necessary to make a mechanism that opens the lid.
To install the pedal, you will need two pieces of wood of the same length. They are attached with screws to the sides of the trough so that they can easily pivot in the vertical plane.
They should protrude from the side where the bird will peck food, here a pedal is attached to them. When the bird approaches the stern, it presses on the wooden pedal, and the far ends of the bars rise slightly upward.
You will need two more pieces of timber to support the lid.They are attached with screws on both sides of the trough. A lid is mounted on the part protruding in front so that in the lower position it covers the feed hole.
On each side, the ends of the upper and lower bars are connected so that when the pedal is lowered, the lid rises and after the end of feeding, under the action of gravity, it lowers and closes the hole.
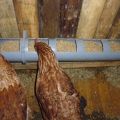
From pipes
Experienced poultry farmers find that feeding pipes is much more convenient than other methods.
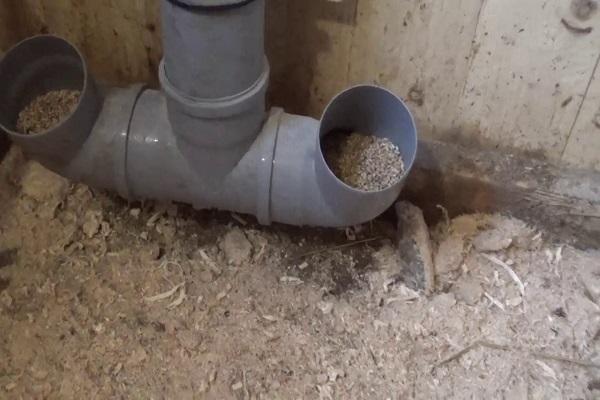
PVC pipe with tee
To create a structure, you need to prepare:
- you will need three pieces of pipe made of PVC, 110 mm wide. Their lengths should be 70, 20 and 10 cm;
- in order to close the pipe openings in two places, plugs will be required;
- tee at an angle of 45 degrees;
- fastening material will be needed in order to fix the pipe to the wall.
Getting started, perform the following actions:
- Connect a long piece of pipe and a tee.
- A plug is attached to the opposite end.
- A piece of pipe 10 centimeters long is attached to the side outlet of the plug.
- The pipe is installed vertically and attached to the wall.
When used, the feed is poured from above and closed with a plug to prevent precipitation from entering.
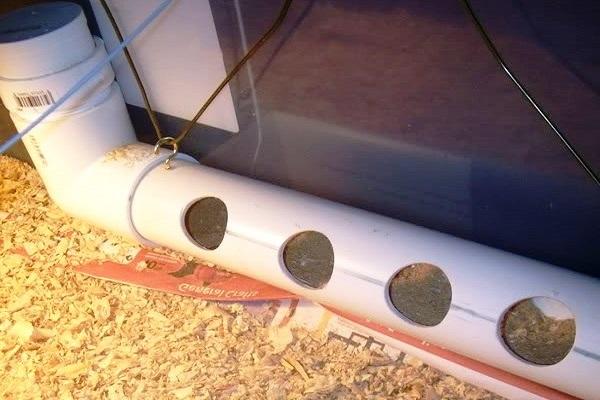
From pipes with knees
You need to prepare to create a feeder:
- A piece of PVC pipe with a diameter of 110 millimeters and a length of 1.5 meters.
- Two knees: 90 and 45 degrees.
- Brackets for wall mounting.
- Pipe plug.
For manufacturing, you need to do the following:
- Attach a 45 degree elbow to the pipe, and the one that is designed for 90 degrees to it.
- Using the bracket, you need to attach the pipe to the wall.
From above, feed is poured into the pipe, then the hole is closed with a plug.
This design is considered one of the most practical.

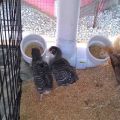
How to use?
The auto feeder is installed in the right place, securely attached to a wall or other base and filled with the required amount of feed. The birds will feed until the supply of food runs out. Therefore, you need to replenish them regularly.
These feeders allow you to dose portions of feed and prevent birds from scattering it.
How to install?
You can install such a feeder in the poultry house or in the fresh air. In the latter case, it is necessary that the feed be protected from precipitation.
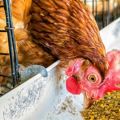
Possible mistakes
Often unused feed remains at the bottom of the trough. It must be cleaned out so that it does not deteriorate and harm the chickens.
It should be borne in mind that auto feeders are designed to dispense dry food only.
The structure must be stable so that birds cannot overturn the feeder.